
How to Clean and Maintain Your Makeup Brushes

A dirty makeup brush is gross and harsh on the skin, but it can have worse consequences than shoddy application.
In order to properly apply your cosmetics, you’ll need to keep your makeup brushes in tip top shape. Read through this Q&A to find out why proper maintenance, storage, and cleansing matters for your brushes, as well as the steps required to give them the proper care.
Why should I clean my makeup brushes?
There are a number of consequences that can arise out of poor maintenance practices. Some affect the makeup directly, while others can affect your overall skin health.
Here’s why you should prevent makeup buildup on your beauty tools:
-
Damaged Brushes
Excessive buildup can cause the follicles in your brushes to fall out or bristles to weaken. A damaged brush is difficult to apply makeup with, and can lead to a sloppy finish. -
Spotty Application
Transitioning from sponges to brushes can help you achieve that flawless finish, but if they’re covered in weeks’ worth of pigments and powders, they’ll be harder to blend, causing your makeup to appear muddy or uneven. -
Irritation
Repetitive use of hardened bristles can eventually lead to skin irritation and damage. Also, skin can react to dirt, oil, and build-up in various ways, including inflammation and irritation. You’ll need to apply more makeup in turn, thus repeating the cycle. -
Bacteria Growth
Your makeup tools encounter a variety of surfaces as they make their way from their storage bag onto your vanity, and they’re bound to come into some contact with bacteria along the way. The brush you use provides a warm, moist environment that acts like a petri dish for a microbial bacteria breeding ground. Each time you use an unwashed makeup brush, you are applying these microbes onto your skin.
-
Breakouts
When using dirty makeup tools, and reintroducing bacteria onto the face you worked hard to cleanse, the bacteria can contribute to clogging your pores and cause acne breakouts. If you use an unsanitized makeup tool, and place it back into your product, you are creating a viscous cycle. The bacteria from the tools will infiltrate the product, so even after you give your brushes a thorough cleanse, you can apply bacteria by dipping into your favorite powder or cream. -
Creepy Infestations
If the buildup of bacteria doesn’t gross you out, how do you feel about the possibility of attracting bugs into your dirty blenders? Look at online YouTube videos of beauty bloggers cutting open their sponges to reveal bugs and mold infestations – some with legs, some with wings, but definitely all disgusting. -
Ripped Eyelashes
Be sure to clean all your makeup tools – not just brushes. If you use an eyelash curler that’s caked in old mascara, your lashes will appear clumpy. Not only that, but you risk losing a couple lashes too, as they’re apt to rip out when sticking to the old product. -
Pink Eye
Sharing cosmetic products is one of the leading causes of pink eye, or conjunctivitis. Always use your own set of freshly sanitized tools whenever borrowing a friend’s products, and be sure to clean your liner brush after letting anyone else borrow it. -
Staph Infection
If pink eye is not enough to scare you into disinfecting your makeup tools, how about the threat of Staph, a potentially life-threatening skin infection? Don’t believe us? Check out the story of 21 year-old who narrowly avoided Staph from spreading to her brain or eyes – which could have led to blindness – after bacteria got into her eyebrow pencil brush. -
Wrinkles
Your skin will start to show signs of wear if it’s constantly stressed-out from coming into contact with bacteria. When skin is stressed, it produces less collagen and elastin, causing it to lose its firmness. -
Wasted Money
You probably invested a lot of money into your first professional brush set, but it’s a total waste if you choose not to take care of them. You also waste money on your makeup products each time you need to apply more foundation to conceal irritation or correct spotty applications.
What are the different types of makeup brushes?
Even the most seasoned beauty experts can be overwhelmed by the extensive amount of makeup brushes that come in a typical set. Here’s a breakdown of the various makeup brushes on the market, what they’re for, and how proper maintenance can make a world of difference:

Makeup Brushes for the Face:
- Foundation Brush: facilitates the smooth application of your base or foundation onto the skin. A clean foundation brush will blend smoothly, giving your skin the most natural look.
- Concealer Brush: used for spot application to even out concealers. When patted on an intended area, a brush with caked up pigment can have the opposite effect – drawing attention to imperfections.
- Stippling Brush: the light fibers of this brush help provide an airbrushed look, something unachievable with thick, hardened bristles.
- Angled Blush Brush: used for perfect blush application. It can make your rosy cheeks appear plain blotchy if not properly cleaned.
- Powder Brush: for dusting your face with a loose or compact powder. An unsanitized powder brush sweeps bacterial microbes across your complexion.
- Contour Brush: designed to contour face. If the bristles are too hard you can wind up looking like a clay statue instead.
- Highlight Fan Brush: to highlight your face, these spread-out bristles pick up a small amount of product to dust over cheekbones. It’s impossible to achieve this effect with dirty, dense bristles.
- Bronzer or Blush Brush: a big, round brush that helps create a natural, sun-kissed look. If your brush loses its fluffiness, you’ll wind up with blotchy application.

There are an assortment of brushes to apply on or around your eyes, as well. Each of these brushes should be cleansed to avoid bacteria, pink eye, Staph infection, wrinkles, and irritation. These tools are applied within close proximity to contact with the eyes, so be extra careful when cleaning:
- Angled Brush: fills in brows or draws winged liner
- Blending Brush: softens out any harsh lines after eyeshadow application
- Eye Liner Brush: precisely deposits the exact amount of desired gel eyeliner while giving maximum control
- Eyeshadow Stamp Brush: stubby, compact bristles pick up the most pigment and place it onto the lids
- Eyeshadow Sweep Brush: used most frequently, this tool smoothly applies various types of eyeshadow onto the lid
- Eye Contour Brush: angled to sweep shadow into the contoured edges of your eyes
- Smudgy Eye Brush: tightly-packed bristles best used to apply smudging creams or shadows along the lash line.
- Mascara Brush (Spoolie): a wand that applies mascara – and stays in a dark, moist environment that bacteria thrive in!
It’s evident that makeup brushes come in a multitude of types, shapes, and sizes. However, there’s one more important distinction when it comes to choosing your makeup brush – for either your face or your eyes – and that’s its composition. There are two main types of bristle fibers:
-
Natural Brushes
These brushes are made from natural animal hair, such as horse, squirrel, sable or goat. Natural hair contains cuticles – dead cells, overlapping in layers, which form scales that gives the hair shaft strength. They also help lift and absorb powdery pigment, along with your skin’s oils, to blend them seamlessly across the face. Natural brushes are recommended for powder-based makeup. -
Synthetic Brushes
Synthetic brushes, made from nylon, taklon, or polyester fibers, contain bristles that naturally gravitate toward each other, allowing for a more streak-free application. Synthetic brushes work best for liquid products, such as foundations and eyeliners. Note: synthetic hairs are not as porous as natural hairs, so they don’t soak up as much makeup, or get as clumpy and gunky; however, liquid breeds bacteria faster than powder, so pay attention to how frequently you use either of these bristles.
What types of makeup brushes need to be cleaned?
So now that you’re aware of all of the brushes available to you on the market, as well as their various pros and cons, you’re probably wondering which of these tools actually need to be regularly cleaned and desanitized. Spoiler alert: all of them! It doesn’t matter how little or how often you use a specific brush, or whether it gets close to your eyes or merely sits atop your cheekbones – all brushes are susceptible to the damage listed above. Keep in mind that you have beauty tools outside of your makeup brush set that also need to be cleaned, including:
- Sponges or Blenders
- Built-in Lip Applicators
- Eyelash Curlers
Anything that comes into regular contact with your beauty routine should be properly sanitized – including hair brushes and tweezers!
How do I clean my makeup brushes?
Most of us are aware that it’s important to regularly clean our makeup brushes, but appropriate cleansing methods are just as important.
If you’re unsure how to go about properly cleaning your makeup brushes, you’re not alone. In fact, 31% of millennials polled didn't know how to clean their makeup brushes properly. Fear not! We’ve broken down the essential steps to cleaning all of your makeup brushes and tools – the correct way.


How to Clean Makeup Brushes
Follow this step-by-step process to keep your makeup brushes in tip-top shape—and keep your skin protected from disgusting bacteria.
- Apply cleanser to brush: Use a gentle cleanser that’s easy on your brush’s bristles and safe for your skin—should product remain on the brush, you want to ensure it won’t affect the sensitive skin on your face.

- Rinse brush: Use lukewarm water to gently loosen the product buildup, and slowly rinse the product from your brush.
- Gently massage brush: Massage the brush against your hand or another clean, sterilized surface to work out as much of the product (and its bacteria).
- Rinse brush again: Put your brush back under the stream of warm water to wash out any remaining product.
- Squeeze water out: Once all product and cleanser has been rinsed, wring the water out.
- Separate bristles: Separate the bristles into the original shape. As your brush is likely intended for a specific purpose, this step will ensure the utility of your tool remains intact.
- Set on clean surface to dry: Place your wrung out makeup brush on a clean towel and allow to air dry. If your sponge or blender is never given time to dry, be sure to inspect it for signs of mold. If you suspect this to be the case, cut open the sponge, and discard it immediately if you spot mold spores.
Pro Tip: If you’re having a hard time getting a stubborn product out of your brush, try rubbing some coconut oil on it. Not only will this soften the bristles, but it’ll loosen the product and make cleaning easier.
Steps to Clean Metal Tools
- Wash metal tools with water and antibacterial soap
- Pat dry with clean towel
- Sanitize tool with cotton ball and alcohol
Pro Tip: Store your tools in a clean container to safeguard your work!

How often do I need to clean my makeup brushes?
After stressing the importance of cleaning your makeup tools – and showing you the easy ways it can be done – hopefully you’re wondering how regularly you’ll need to cleanse your toolkit. The answer can vary depending on which brush or tool, as well as its usage and your skin’s sensitivity level. On a general level, however, it’s not done frequently enough. As many as 61% of the women polled admitted to cleaning their makeup brushes less than once a month or not at all.

To keep your tools in tip-top shape, and to ward off unwelcome visitors from making a home in your makeup products, we recommend the following schedule:
- Brushes: You should clean your brushes every week to keep the germs away from your face. As mentioned before, the frequent use of natural versus synthetic brushes could affect how often you need to clean them.
- Sponges: Rinsing the sponge with warm water after each use will help fight off bacteria and keep it in the best condition. If this isn’t an option during a rushed makeup application, be sure to thoroughly wash your sponge every few uses or once there is no longer a clean, unused portion.
- Tools: Ideally, metal tools – such as tweezers, eyebrow trimmers, cuticle or nail clippers, and eyelash curlers – should be cleaned with at least soap and water after every use. However, aim to give them the full sanitation treatment every two weeks.
How do I maintain my clean makeup brushes?
You set aside the time, and have thoroughly cleaned your collection of makeup brushes and tools – but the care doesn’t end there! To maintain your brushes and make them last forever, you’ll need to learn how to properly use and store them as well.
How to Store Makeup Brushes and Tools
-
Upright Jars
Try to store your makeup brushes upright in jars to preserve their shape. Fill the bottom of each jar with coffee beans, rice, or pebbles so that the brush heads don’t touch and cross contaminate. -
Countertops
If you don’t have enough space for jars, store your products in drawers instead of countertops to keep them out of direct sunlight and protect their delicate bristles. By not having them lay haphazardly about the counter, you’ll be better prepared for spills or any of life’s little accidents. -
Sort Your Brushes
Wherever you decide to store your makeup set, be sure to separate your brushes by face and eye usage. This will prevent smaller brushes, such as your angular brush or smudgy eye, getting caught and damaging the bristles in a bigger, bronzer brush.
Never use expired makeup! To maintain your brushes and the work you put into keeping them clean, avoid using old, bad makeup at all costs. Use this guide to determine when it’s time to toss a product:
-
Mascara: 3 Months
Bacteria love to hide in these pretty tubes, so replace your mascara four times a year to prevent eye infections. By three months, it’s probably getting cakey and dried up anyway. -
Eyeliner: 3-6 Months
Eye pencils and retractable pens have a longer shelf life because they are constantly being sharpened or worn down, but if you don’t use them within the first year, they should meet the trash can on their anniversary. -
Eyeshadow: 2 Years for Powder, 1 Year for Cream
Eyeshadow palettes can last quite a while, but if you apply it every day, the bacterial buildup can result in an eye infection. -
Foundation: 1 Year
In general, the color and consistency of your cosmetics will change after a year. However, if you use foundation with an unclean applicator, bacteria will build up more quickly. For best practices, keep your foundation out of direct sunlight and tightly close the lid or pump. -
Concealer: 12-18 Months
If you dab on a concealer with your finger, you’re more likely to transfer bacteria, and should err on the shorter side of this timeline. The case is especially true for those with tubed concealers using wands. -
Blush or Bronzer: 2 Years
Powders have a longer shelf life, as they don’t contain oil and water. Nonetheless, they will eventually start to harden and cake up, causing damage to your clean, soft brushes.

Final Tips for Makeup Brush Maintenance
- Depending on the brush, the bristles may become rough, dull, or uncomfortable after too many washes. To get softness back into your brushes, use a dab of conditioner to soften the coarse bristles.
- Brushes are shaped in specific ways to accomplish a designated job, but this can be disrupted when laid flat to dry. To keep all of your brushes in perfect shape – and working at their top capacity – hang them upside down, or allow the bristles to hang over the lip of a counter or sink to air dry.
- To keep your brushes and tools sanitized between deep cleanings, pick up a quick and convenient daily cleanser you can spritz onto them after you’ve finished your application.
- Know when to toss out your makeup sponge and brushes. Even if you diligently wash your sponge or blender, you need to get a new one every month. If you’re not interested in frequent care for such throw-away products, pick up a cheap disposable bag of applicators from the store. Brushes, on the other hand, can last much longer depending on quality and cleanliness. If you take proper care of your makeup brushes, they can last anywhere between one and five years.
To keep your complexion clear, and to apply your makeup flawlessly, keep your brushes in shape with the proper clean and care. Be sure to give your brushes TLC all year round, not just during seasonal skincare routines. Your skin – and wallet – will thank you!
Featured Products

Available in 4 shades
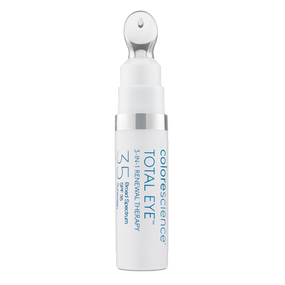
Total Eye® 3-in-1 Renewal Therapy SPF 35
(login for member perk!
+)
login for member perk!
Price:
$79.00
Price:
$79.00
(up to value)
$79.00


Available in 6 shades
Sunforgettable® Total Protection® Face Shield Flex SPF 50
(login for member perk!
+)
login for member perk!
Price:
$58.00
Price:
$58.00
(up to value)
$58.00


Color: