Types of Makeup Brushes: The Complete Guide to Makeup Brush Names & Uses
Makeup brushes are integral to achieving a flawless, airbrushed look that’ll help you face your day with confidence. However, the extensive selection of brushes available on the market can make the buying experience intimidating. If you happen to buy a multi-pack set, you might not even know all of the makeup brushes’ names, or be able to discern their specific uses. Sure, using your finger as an applicator is a tried and true way to apply foundation, but if you want to graduate from amateur to pro in the beauty world, you need to arm yourself with the right knowledge to make it happen.
Investigating all the types of makeup brushes is a daunting challenge alone. So, we’ve distilled the options down to the most useful and multi-use tools. Knowing how to use makeup brushes allows for the precision and control you need to achieve a diverse range of looks.
Do you have a specific makeup brush you’re looking for? Check out our makeup brushes guide below to get the information you need—you’ll be on your way to slaying in no time:
- General Face Brushes:
- Powder Brush
- Tapered Foundation Brush
- Stippling Brush
- Kabuki Brush
- Contour Brush
- Silicone Blender
- Beauty Blender
- Fan Brush
- Blush Brush
- Eye Area Brushes:
- Eye Brow Brush
- Angled Eye Shadow Brush
- Eye Shadow Crease Brush
- Eyeliner Brush
- Brow Brush
- Mascara Wand
- Lip Brushes:
- Lip Brush
- Lip Liner Brush
- Cleansing
General Face Brushes
1. Powder Brush

Powder Brush Use
Gently dusting loose powder products across your face.
Powder Brush Guide
A powder brush is generally a thick, full-fibered brush—either synthetic or natural—that has the versatility to perform a multitude of beauty jobs. This omnipresent makeup brush (you can hardly find a makeup set without it) is an important tool to have in your makeup arsenal.
To use a powder brush for foundation, dip the brush into the powdered product—applicable for both pressed and loose powders—and swirl in circles or sweeping strokes until you achieve even coverage. Pro tip: it’s easier to ensure adequate application if you start in the middle of your face and work your way out.
This is an exceptional beginner multi-tool, especially for use as a mineral foundation brush, because it’s simple to blend and work in your product.
Of all the types of makeup brushes, powder brushes are well-suited for adding color like blush when you want a more natural, less pigmented result. Think a dusting of rosy cheeks instead of a dramatic, deeply-hued look.
Apply top-rated sunscreen products with powder brushes for seamless, mess-free coverage.
2. Tapered Foundation Brush

Tapered Foundation Brush Use
Precise application of foundation, highlight, or blush.
Tapered Foundation Brush Guide
Tapered foundation brushes are usually flat, less full in form, with a gentle taper. These brushes are best for liquid foundation and other liquid products. If you are having trouble deciding on a type of foundation, learn more about the different types of foundation here. To use, start by dipping your brush in warm water then gently squeezing out the excess. If it’s hot and you’re prone to sweating, use cool water for a more refreshing application experience.
The water serves two functions here: one, to ensure an even coat of your foundation and two, to keep the brush from absorbing any of the foundation—saving you money since the brush won’t soak up any of your makeup. However, take care to remove the water by gently squeezing excess water out into a towel; too much moisture will dilute your makeup, making the product’s coverage ineffective.
Using the right brush ensures your foundation makeup blends seamlessly for a natural, even finish.
To apply makeup using a foundation brush, guide the brush along your face in even strokes. Take care to ensure that the makeup is blended in and no harsh lines are left behind. Again, it’s often easier to start in the middle and work your way outward.
Many types of makeup brushes are multi-use, so don’t be afraid to use your flat foundation brush to apply a little highlighter to your temples or spot-correct, too.
3. Stippling Brush

Stippling Brush Use
Creating a flawless, airbrushed look.
Stippling Brush Guide
A stippled brush has a striking appearance—the fibers are of two distinct lengths. The bulk of the brush is full fibered and tightly packed with longer fibers interspersed. Stippling brushes are great for layering different levels of makeup. Primer, foundation, and blush can be seamlessly worked together with this type of tool.
While stippling brushes can be used with powders, its best use is for liquid cream foundation or cream blush products. To use, put cream blush or foundation on the back of your hand, carefully dip the brush into product and stipple onto face.
How do you “stipple” exactly? Use small motions to push the brush down onto your face. Think of a gentle makeup pogo stick. After the initial stipples, it’s time to utilize those longer bristles. Gently press down with the longer bristles and make soft swirling motions. Don’t push too hard with the bristles because too much pressure will end up leaving puddles of makeup—so far, that hasn’t been a makeup trend, so best to avoid it.
4. Kabuki Brush

Kabuki Brush Use
Applying loose powder or body shimmer.
Kabuki Brush Guide
Kabuki brushes are some of the most impressive looking brushes. They’re often of the larger variety, with tightly packed fibers, however, you can get a travel-sized mini kabuki brush as well. They’re best to use with loose powders on body and face. Want to add some shimmer to your décolletage? Swirl your illuminizing product in large circles for a magical, illustrious finish.
Kabuki brushes are also great for powder foundation and blush. Diffuse concentrated product by swirling the brush in makeup, tapping to remove excess and then gently applying by using large, circular motions.
Need to set your makeup with finishing powder? Dip your kabuki brush into the product and spread evenly across your face. Be careful not to press to aggressively so as to avoid disrupting the placement of your blush, highlighter, etc.
5. Contour Brush

Contour Brush Use
To achieve angular, defined cheekbones and facial structure.
Contour Brush Guide
Contouring is a makeup application skill every beauty lover should know, but one that takes practice to perfect. Worst-case scenario when you’re attempting a good contour? Dark, unblended streaks. But we’ve got your back so you’ll never leave the house a two-toned nightmare.
The first step is investing in a good angled contour brush, it’s important to use angled brushes rather than flat brushes because they allow you to follow the natural curves of your face.
To get a contoured look, choose your dark contour color (this is the “shadow” that will serve as a contrast to the “highlight”). Usually, especially if you’re fair skinned, you don’t want to go too dark. Stick with a medium tone but take note: if it’s not dark enough, there won’t be a contrast. You have to find that Goldilocks fit.
So, you’ve got your darker contour color. Now, let’s map out your face.
If you want to minimize your forehead, trace the area with the angled contour brush near your hairline.
Next, make a pout with your face. Just under your cheekbones, use the contour brush to apply the darker tone to the hollow beneath the apples of your cheeks.
If you want to slim your chin, take the brush and make parentheses around it. And finally, add some darker lines on either side of your jaw bone. Now, your face should be mapped out with the darker contrast.
The next step is to blend everything together. It sounds simple but it’s actually the most difficult and critical part of making the contour look as natural as possible.
To blend you can use a powder brush, a kabuki brush or other full-fibered brush.
The very last step is to add a highlighter to your cheeks, forehead, nose, chin and Cupid’s bow which can be applied with smaller brushes. Use general powder brushes for highlighting larger areas.
Contouring brushes give you fine precision control over the angles with which you can achieve a Kardashian-level contour. Who needs Photoshop when you’re already picture-perfect?
6. Silicone Blender

Silicone Use
To seamlessly apply foundation and blend products.
Silicone Use Guide
Silicone blenders are generally flat and oval or teardrop-shaped. The great part about using a silicone blender is that there is no chance of it absorbing anything, meaning that you’re not wasting precious product.
To use, dab foundation and stipple onto all parts of your face, making sure you are blending into your neckline as well. Tapping motions work best for more a natural look so focus on short, staccato motions instead of swirling as you would for a traditional brush—swirling with a silicone blender can mean smeared makeup.
7. Beauty Blender

Beauty Blender Use
Applying wet and dry foundation, blush, highlighter and concealer.
Beauty Blender Guide
The Beauty Blender is a makeup darling of YouTube beauty stars. The Beauty Blender and other similar makeup sponges are favorited for a reason: they’re a great way to apply a multitude of products. You can use it as a primer applicator for an even, solid base. You can even use it for applying sunscreen or topical creams. Of course, most commonly, beauty-lovers use it to apply foundation and blend blush, bronzer, and highlighter.
To use with liquid foundation, run the sponge under the sink with cool or warm water and then press the sponge to remove extra water. Water helps keep the sponge from absorbing any of the makeup. Now, gently dab the sponge into the makeup product you’re using and apply some to the wrist or back of your hand for a coverage test. Then, apply product to your face using soft dabbing motions. Less is more when using a Beauty Blender.
For smaller areas, use the tip of the Beauty Blender for detail work like applying highlighter to your cupid’s bow or shimmer to brow bones.
If you’re using dry powder, simply pour some of the product onto the lid and dab the sponge directly in the product. Use the same process as you would for liquid foundation. Be aware you might have to re-moisturize the sponge as it can dry out during the application process.
Already done with your makeup but it looks a little patchy? Here’s a useful trick: use the Beauty Blender’s side and roll it across your entire face to blend in all areas of your face.
8. Fan Brush

Fan Brush Use
Applying highlighter, brush away makeup mistakes, and blend out dark lines.
Fan Brush Guide
A fan brush is shaped like—surprise—a fan. These types of makeup brushes are a great basic to have in your makeup toolbox because of their multi-use functionality.
For example, they work exceptionally well as a mistake-corrector. Maybe you’re applying a smoky eye and you got carried away the eye shadow, flecks of pigment are everywhere, and you’re a raccoon now. Gently brush away these extra flecks of color with the fan brush.
For bronzer or highlighter, use a fan to gently buff product onto your cheekbones using a sweeping motion.
You can also use fan brushes to diffuse color. Mellow out dark blush by fanning away the intensity.
An alternative use for fan brushes is to use them as an applicator for lotion, sunscreen, or concealer. It’s a gentle, soothing way to apply all manners of skincare products. Pretend you’re at a day spa, close your eyes, turn on Enya, and use the fan brush to fan away all your worries while applying your retinol cream like a real esthetician.
9. Blush Brush

Blush Brush Use
For the application of blush to get that fresh-faced, youthful rosiness.
Blush Brush Guide
A blush brush is surprisingly similar to a powdered brush. Brushes for blush are generally a little stubbier, however, as they are covering a smaller area than a powder brush. When applying blush, try to avoid Raggedy-Ann-reminiscent red circles on your cheeks.
To avoid the doll look, diffuse blush outward while applying to the apples of your cheeks. Start with light pressure and test out the pigmentation on your wrist or the back of your hand. It’s much easier to build color than it is to wipe it away after it’s already been applied.
10. Eye Shadow Brush

Eye Shadow Brush Use
Applying swaths of general color to your eyelids.
Eye Shadow Brush Guide
A general eye shadow brush is a small, usually stubby brush meant for sweeping eye shadow all across the lid and upper eye area. This is a great tool to use for eye shadow primer, as well. Simply dip the brush into the shadow, tap off excess, and apply to lids. For a more pigmented effect, you can dip the brush in water.
11. Angled Eye Shadow Brush

Angled Eye Shadow Brush Use
For smudging and contouring eye makeup.
Angled Eye Shadow Brush Guide
For more proficient beauty lovers, an angled eye shadow brush is a perfect addition. Use it to add intense colors to the corner of your eye, for precise smudging, and to line your crease with a contrast color.
12. Eye Shadow Crease Brush

Eye Shadow Crease Brush Use
For creating the illusion of depth and adding a dramatic contrast to your base lid color.
Eye Shadow Crease Brush Guide
Eye shadow crease brushes generally have a gentle taper; this allows tight precision when you’re adding in the final touches of your smoky eye. Use it to layer pigment where eye lid naturally folds.
13. Eyeliner Brush

Eyeliner Brush Use
For adding liner to achieve a fuller lash line or cat-eye look.
Eye Liner Brush Guide
Brigitte Bardot, Twiggy, Marilyn Monroe—these icons all used a cat-eye to achieve a glamorous, sultry look. An eyeliner brush serves multiple purposes. First and foremost for your eyeliner, of course. To use, dip the brush into the eyeliner pot (often, eyeliners will have brush integrated into the product). Starting from your inner eye, draw a line outward, gradually increasing the width of the line and flicking out toward the ends.
Practice makes perfect, as they say, and is especially true for trying any sort of eyeliner techniques. The key to eyeliner is steady hands (don’t drink three cups of coffee before attempting this). Sometimes, a selfie after applying your liner is a good idea to check the similarity of your wings.
A great way to start on building your cat-eye prowess is by using the hash or dot method. Use the eyeliner brush to make small hashes or dots along your lash line and a final dot where the tip of the wing will go. Connect the dots to get to cat-eye perfection.
If you really want precision, you can use a stencil or even tape if you want to make sure the angles of both your wings match.
14. Brow Brush

Brow Brush Use
Used for taming and styling your brows.
Brow Brush Guide
Most brow brushes come double-sided—a comb side and a brush side. You can even get customizable brow kits for any eyebrow color. You can calm even the most unwieldy brows with a duo-brow brush. First, use the comb to straighten and form your brow shape.
Then, use the brush side to apply your brow product whether that’s powder or a gel. Whether cream or powder, use short staccato strokes, making sure to come to a defined point at the ends. And remember, your brows are sisters—not twins. Follow the natural shape of your brows rather than forcing them into unnatural forms. Embrace that extra tuft on your left side!
15. Mascara Wand or Spoolie

Mascara Wand Use
To apply mascara to your upper and lower lash lines.
Mascara Wand Guide
Mascara wands are handy tools everyone should have. They help separate and define each lash. Before you apply your mascara with your spoolie, you can use an eyelash curler for an even more dramatic, full effect.
After curling, sweep up your mascara wand, making sure to squeegee excess product on the opening of the mascara tube to avoid excess mascara on your lashes—this way, you won’t have spider lashes or an overly sticky upper and lower lash situation.
In a pinch, use a clean mascara wand to tame your unruly brows.
Another tip: if you love a certain mascara wand, but don’t love the mascara formula, keep the wand, sanitize it, and use it with a different formula.
Lip Brushes
16. Lip Brush

Lip Brush Use
To precisely apply lipstick, gloss and other lip products.
Lip Brush Guide
Have you ever seen a toddler apply lipstick? They’re typically just trying to get the lipstick somewhere close to their lips with little to no success. Even as an adult, it can be hard to stay in the lines when you’re faced with the applicator that already comes with lip products.
So, to solve this problem you should invest in a lip brush. Simply dip the brush into your lip product and apply directly to your lips. Finish the look with a similarly colored liner.
17. Lip Liner Brush

Lip Liner Brush Use
To add lip liner after main lipstick or gloss application.
Lip Liner Brush Guide
Flat and tapered, lip liners help finish your lip look. Precisely line your lips, smooth over imperfections, and gracefully shape your mouth.
Understanding which brush to use for each product is essential, but mastering the proper makeup steps in the correct order ensures a flawless, long-lasting application.
Cleansing
While we’re talking about makeup brushes, it’s important to keep an eye on your routine to avoid infections, rashes, and other unseemly effects from using dirty brushes. To wash your brushes and keep bacteria at bay, use a gentle cleanser or brush-specific cleanser and wet the bristles (avoid getting water on the handles). Then, swirl the brush on a paper towel, or try a makeup brush cleaning wipe, and repeat until the brush is clean. Make sure there is no soap left in the bristles by rinsing them. Let the brushes air dry to preserve their shape.
Makeup brushes and their uses can be a complicated puzzle to solve but it’s well worth the trouble. The right types of makeup brushes and knowing how to use them properly can elevate your beauty game. If you need detailed instructions for applying makeup, we’ve got you covered, too.
Frequently Asked Questions
1. How to Choose a Makeup Brush Set?
Look for sets with essential brushes including powder, foundation, blush, and eye shadow. Consider natural or synthetic fibers—synthetic works for liquids while natural excels with powders. Choose various shapes: full-fibered for coverage, tapered for precision, angled for contouring. Quality brushes provide better control.
2. What Makeup Brushes Do I Really Need?
Essential brushes include powder brush for foundation and setting, stippling or tapered brush for liquids, blush brush for cheeks, kabuki for finishing powder, eye shadow brush, and beauty blender or silicone applicator. These versatile tools cover major needs. Start with basics, then expand.
3. Can I Use a Blush Brush for Foundation?
Blush brushes are similar to powder brushes but stubbier for smaller areas. While usable for powder foundation in a pinch, it's less efficient for full-face coverage. Powder or kabuki brushes work better due to fuller size and fiber density, providing even, efficient coverage.
4. Which Makeup Applicator Works Best for Cream Versus Powder Products?
Stippling brushes, tapered foundation brushes, and beauty blenders excel with cream products like liquid foundation and cream blush. For powders, use full-fibered powder brushes, kabuki brushes, or dry beauty blenders. Silicone blenders work well for creams since they don't absorb product. Dampen sponges for liquids.
5. Which Shape Makeup Brush Is Best to Lightly Apply and Blend Powder Products?
Powder brushes with thick, full fibers gently dust loose powder across your face, creating natural results. Kabuki brushes excel at diffusing concentrated powder using large circular motions. Fan brushes work beautifully for light highlighter application and blending intensity. Start in the middle and work outward.
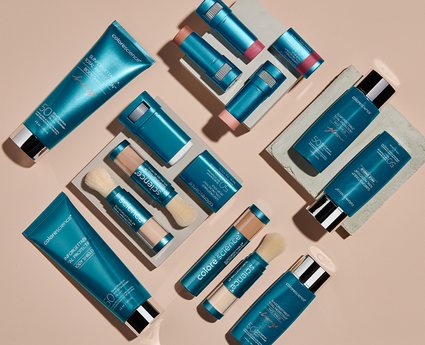
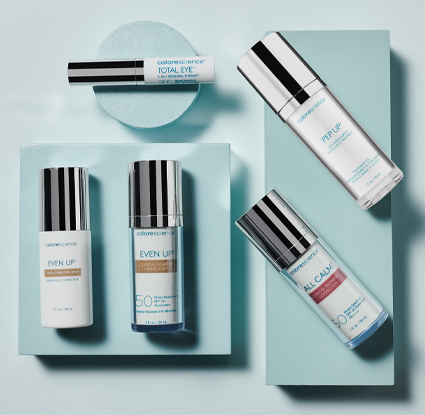
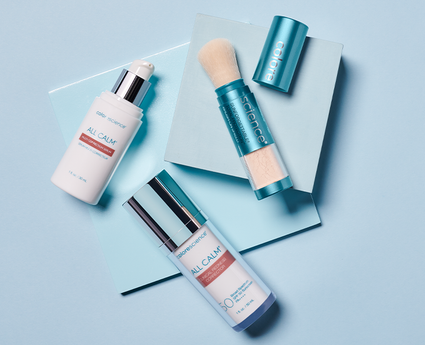
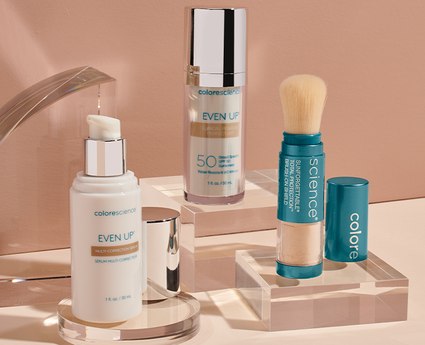
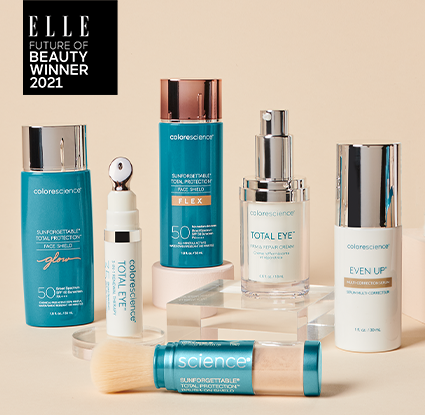
Featured Products

Available in 4 shades
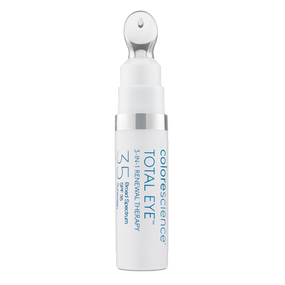
Total Eye® 3-in-1 Renewal Therapy SPF 35
(login for member perk!
+)
login for member perk!
Price:
$79.00
Price:
$79.00
(up to value)
$79.00


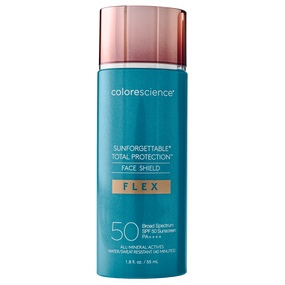


Available in 6 shades
Sunforgettable® Total Protection® Face Shield Flex SPF 50
(login for member perk!
+)
login for member perk!
Price:
$58.00
Price:
$58.00
(up to value)
$58.00


Color: