
Makeup Steps: How to Apply Makeup Step by Step
The power of makeup is undeniable; our favorite products help us create the beauty looks we love, enhance our favorite features, and encapsulate our individual definitions of beauty. The best makeup routines help the modern woman boost her confidence and face the world head-on—no matter what the day has in store.
When it comes to makeup, skillful application can make all the difference. Applying your favorite products the correct way and applying the right amount of product can do two things: help you achieve the beauty look you crave and help you get the most out of your makeup.
Learn how to apply your makeup with these important beauty tips. From applying liquid foundation to using a gel eyeliner, this breakdown of makeup steps and tips will help you create a flawless look that you can be proud of.
- Step 1: Moisturizer
- Step 2: Primer
- Step 3: Liquid Foundation
- Step 4: Concealer
- Step 5: Foundation Powder
- Step 6: Bronzer
- Step 7: Blush
- Step 8: Highlighter
- Step 9: Eyeshadow
- Step 10: Eyeliner
- Step 11: Mascara
- Step 12: Lip Gloss
- Step 13: Setting Spray & Setting Powder
SHOP NOW
What Is the Correct Order of Makeup?
We know you’ve watched countless makeup tutorials online, have seen your favorite celebrities get their makeup done with their favorite cosmetics, and may have even done yours alongside them. But there are never too many helpful tools and guides to aid you along on your makeup journey!
That’s where we come in with our guide on how to do makeup step by step at home. Before we give you the 4-1-1 on all of these steps to apply makeup, we want to let you know there really is no set-in-stone correct order.
When it comes to following makeup steps, you want to remember that you should do what works best for your skill level, your skin, and the overall look you are going for.
Even though there are quite a few ways to go about it, and there will be different makeup steps to follow depending on the style and coverage you’re going for, we’ve outlined a straightforward tutorial for how to apply makeup for beginners that can help you achieve a beautiful look every time.
Let this makeup step-by-step routine provide you with a foundation (see what we did there?) for makeup application. Allow it to help you get more comfortable with everything from mineral foundation application that can help you minimize the appearance of redness to finishing things off using a setting spray that will keep your makeup in place.
If you are someone who likes minimal makeup, Start your routine with the best tinted sunscreen for SPF and even coverage that preps skin perfectly for makeup.
We hope this step-by-step makeup guide helps you to feel more confident in your own skin and gets you one step closer to the makeup look you are going for.
What Makeup Goes First?

When it comes to successfully applying makeup that will last and look stunning, applying primer should always be your first step.
Primer helps to prepare the skin; it fills fine lines and wrinkles to create a clean palette for your makeup and provides a better base level, overall making your makeup last as long as possible. The primer you choose should be lightweight and oil-free.
Colorescience has a variety of primer options—including brightening and mattifying primers—to get your face ready for a close-up.
Steps to Apply Makeup
As we mentioned before, there isn’t only one way to apply your makeup, and there aren’t makeup steps that are set-in-stone. But, we are able to provide you with a breakdown of the steps that work for us here on the Colorescience team.
We’ve taken the time to make sure this order of steps for how to apply makeup makes the most sense and can help to provide you with a stunning makeup look!
Alright, makeup at the ready. Let’s get started.
Steps to Applying Makeup
- Step 1: Moisturizer
- Step 2: Primer
- Step 3: Liquid Foundation
- Step 4: Concealer
- Step 5: Foundation Powder
- Step 6: Bronzer
- Step 7: Blush
- Step 8: Highlighter
- Step 9: Eyeshadow
- Step 10: Eyeliner
- Step 11: Mascara
- Step 12: Lip Gloss
- Step 13: Setting Spray & Setting Powder
Step 1: Moisturizer
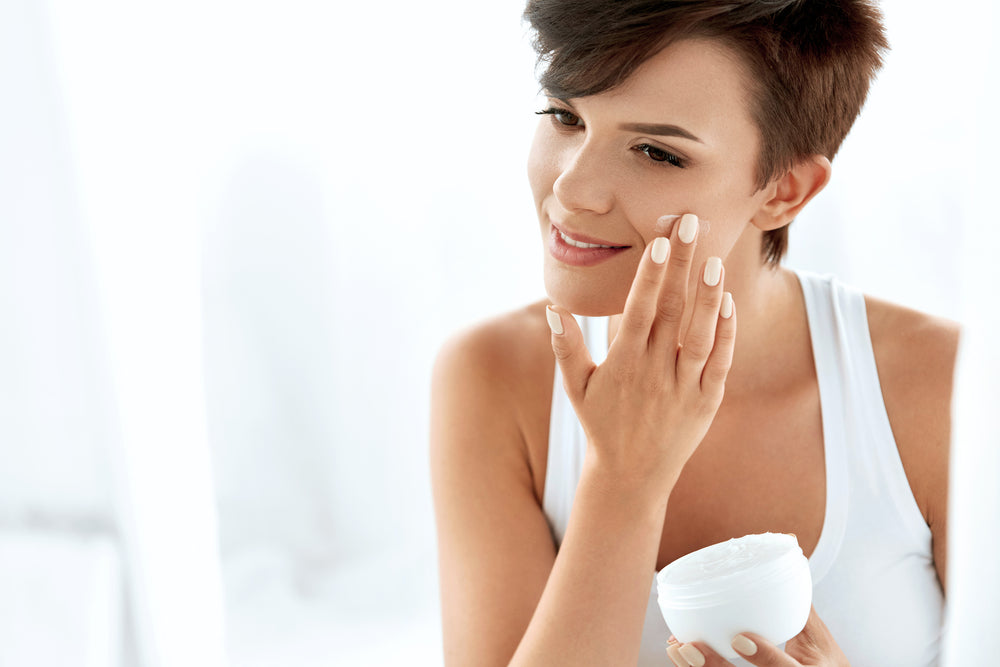
Before you begin applying your makeup, take the time to prep your skin with a high-quality moisturizer.
Choosing the right kind of moisturizer for your skin is a crucial piece of the puzzle. Let’s take a look at the different types you can use, listed from lightest to heaviest:
-
Face Mists: These are water-based solutions that may contain certain skin-boosting vitamins and fragrances. Facial mists aren’t designed to return the moisture to your skin, but they can be a helpful tool for maintaining a dewy look all day long. Simply spritz throughout the day when your skin is feeling dry.
-
Serums: This is a lightweight solution that’s easily absorbed by the skin. There are a wide assortment of serums designed to target specific problem areas. Some serums help you moisturize the skin to prevent wrinkles, while others contain ingredients that may add brightness to a dull complexion.
-
Lotions: Lotions are the most common type of moisturizer, and can benefit a variety of skin types. Opt for lotions that are labeled as “non-comedogenic”; these products are designed to avoid clogging the pores.
-
Creams: If your dry skin needs extra help, it might be time to invest in a cream moisturizer. This is a thicker, heavier solution that can hydrate excessively dry complexions. Day creams can be used as a base under your makeup, but night creams are designed to give your skin an extra dose of moisture while you sleep. Apply before hitting the pillow, and in the morning you’ll be greeted with soft, supple skin.
-
Oils: If you need further moisturizing, consider oils. Certain oils can be a great option for those with dry, sensitive, or normal skin. However, if you’re acne-prone or struggle with a need for specially made oily skin makeup, you should avoid oil moisturizing products.
Learning how to apply moisturizer correctly is half the battle. Apply a small amount onto your fingers. Start by spreading the moisturizer across your forehead; begin from the center of your face, then move outwards and up.
Then, do the same, starting at your nose and spreading the moisturizer across your cheeks. Ensure you’ve rubbed in the moisturizer evenly across your skin. Once you’ve applied enough moisturizer, gently rub it in using circles, and give it a few minutes to dry before moving on to the next step.
Choose the best products from our top-rated collection before foundation for lasting protection.
Moisturizer Recommendation

Barrier Pro™ Essential Moisturizer is clinically tested and developed with skin health professionals to help replenish hydration. This ultra-nourishing, emollient cream melts into skin for a velvety finish and immediately provides nourishment.
More than just moisturizing, it strengthens your skin’s protective barrier and supports a balanced microbiome, so your skin can better adapt to stressors like UV and HEV (blue) light.
Plus, its soothing botanicals and antioxidants help calm and protect, leaving you with skin that feels light, fresh, and ready for anything. It’s perfect for all skin types and layers seamlessly with other daily skincare favorites.
Step 2: Primer

Now that your skin is well moisturized, prep your face with primer. Whether you’re planning on applying a light coat of foundation or a full face of makeup, primer is an important first step. Using primer under your makeup will make your look last longer.
So what exactly is primer? Think of primer as a base for your foundation or face makeup that will help it go on smoother and last longer. Primers are silky smooth gels and creams that fill in the lines and pores on your face, smoothing out uneven textures and creating the ideal canvas for your makeup.
To apply your primer, begin by squeezing a small amount onto your fingertips, or onto your preferred makeup brush or sponge. Pro Tip: A little bit goes a long way. Start with a dime-sized amount of primer in the center of your face, and slowly work it out towards your cheeks, forehead, and chin.
If you want to apply primer to the sensitive skin around your eyelids (and keep that smokey eye looking professionally applied all day long), be sure to find a dedicated product for this area of the face.
Our eyelids can collect grease throughout the day, causing a “creased” look in eyeshadow. If your eyelids are oily and you apply eyeshadow or eyeliner without primer, application may prove to be patchy and uneven.
Primer Recommendations
There are a variety of primer formulas that can help you achieve the results you’re hoping to achieve with your makeup look.
Consider the Calming Primer SPF 20 if you have sensitive or redder skin, as it soothes the face with its fragrance-free formula and a blend of botanical extracts and antioxidants. Also ideal for reactive skin, this 3-in-1 primer neutralizes redness, hydrates, and extends makeup wear with a light texture.
For dull skin, Brightening Primer SPF 20 brings a subtle, radiant boost to instantly brighten your complexion. It effortlessly smooths skin and sets the stage for makeup, helping you look fresh and luminous.
If you want a touch of bronze, the Bronzing Primer SPF 20 will give your skin a healthy, sun-kissed glow. Formulated with rice proteins and peptides, this primer blurs imperfections and firms skin.
For oily or blemish-prone skin, Mattifying Primer SPF 20 is your go-to for shine control and a flawless matte finish. The silky formula absorbs excess oil, blurs imperfections, and firms skin.
Each primer is non-comedogenic, water resistant (up to 40 minutes), and packed with mineral SPF 20 to help protect against sun damage and environmental stressors.
Step 3: Liquid Foundation
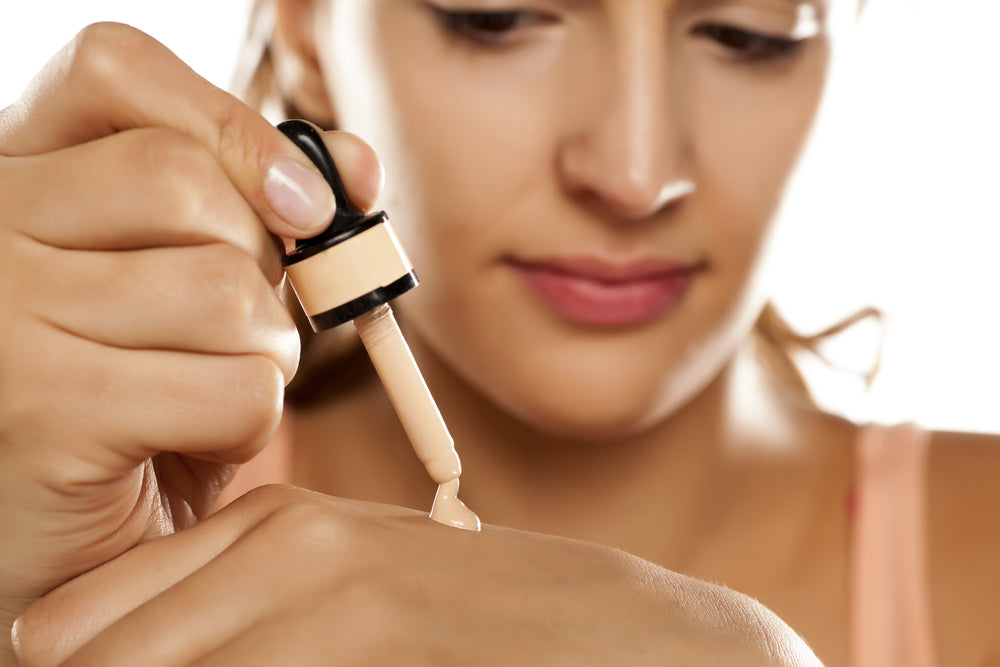
The first step after primer is applying makeup foundation that evens tone without settling into fine lines.
When it comes to foundation, finding the perfect shade for your skin is priority number one. The right shade of foundation can make all the difference.
So how do you go about picking? Test foundation colors against your jawline. After applying, if the foundation disappears without any sort of blending, you’ve found your true match. This may take a bit of trial and error, but taking the time to pick the right shade is crucial. After you’ve selected a product, consider the tools you’ll use to apply it.
Some women prefer to use their fingers, while others opt for beauty tools like brushes and sponges. If you’re looking for a light coverage look, your fingers may prove to be the right applicator; however, never touch your face without thoroughly washing your hands, and be sure to wash them after application—you don’t want to find your makeup handprints all over the house. For a more full-coverage look, opt for an applicator brush or beauty blender.
Start from the center of your face and blend the liquid foundation outwards. As you sweep your foundation across the skin, be sure to buff it in. Some women like to stipple a damp sponge over their foundation to help ensure it gets into those lines and creases, which can create a smoother, more even texture. Certain types of makeup brushes are also great for buffing foundation into the skin.
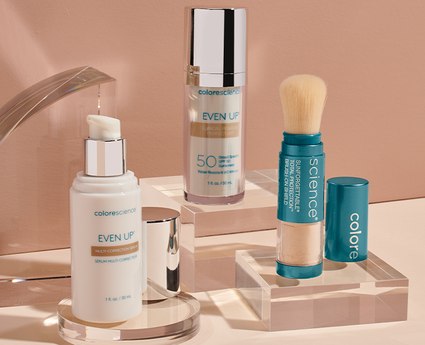
Foundation Recommendations
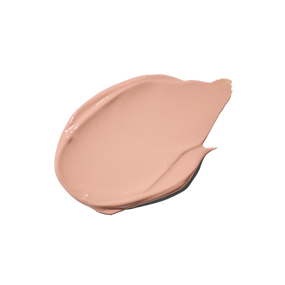
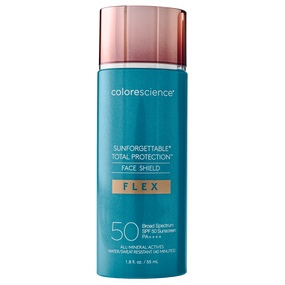
Sunforgettable® Total Protection® Face Shield Flex SPF 50 is a lightweight, liquid mineral foundation that adjusts to your skin tone with iron oxide pigments.
This unique formula uses patented EnviroScreen Technology, providing a high level of protection against UVA/UVB, HEVE (blue) light, pollution, and infrared radiation. Perfect for daily wear, it offers medium coverage with a demi-matte finish, so your skin looks natural and flawless.
For a lighter, whipped texture, Tint du Soleil™ Whipped Mineral Foundation SPF 30 offers buildable coverage that nourishes as it perfects.
This foundation is packed with skin-boosting peptides, ceramides, and a multivitamin complex, helping to hydrate, minimize fine lines, and improve skin texture over time. With mineral protection, it is ideal if you’re looking to add a little extra skincare to your routine, leaving skin silky and radiant all day.
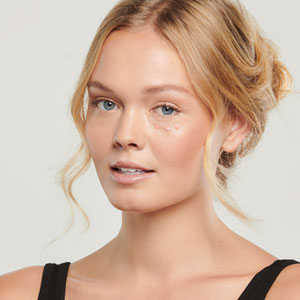
Step 4: Concealer
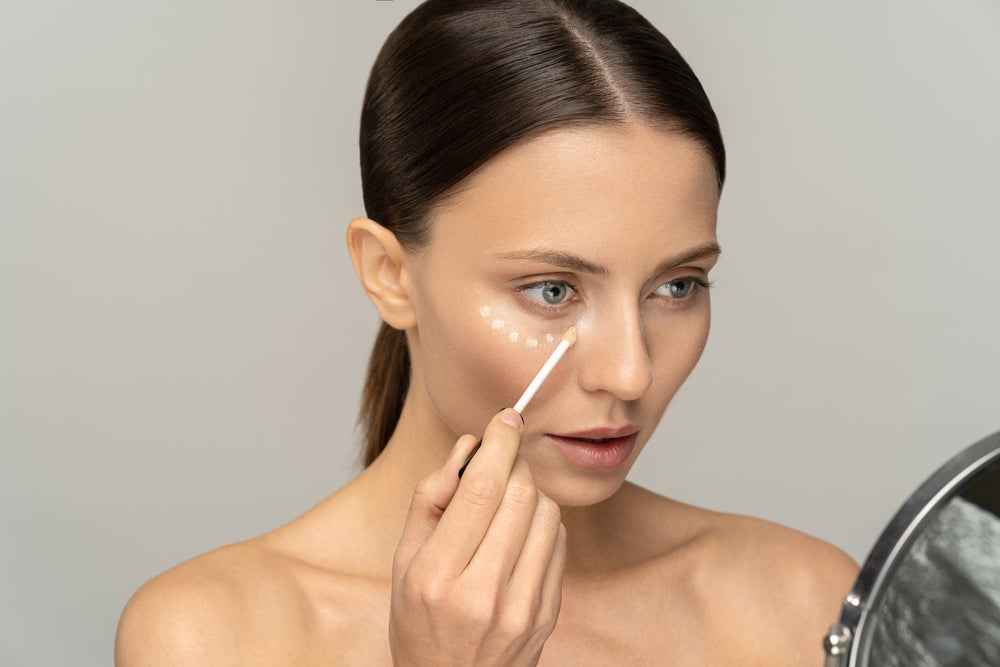
There are two main categories of concealer: liquid and stick/compact.
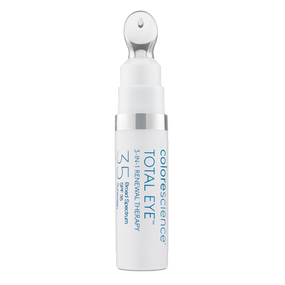
Liquid concealer is best for the times you want light coverage over a large area of your face, or better yet, you can try a no-makeup makeup solution like Total Eye® 3-in-1 Renewal Therapy SPF 35. It’s an excellent concealer alternative because it’s an eye cream, brightener, and sunscreen, all in one.
Achieve a natural look with Total Eye® 3-in-1 Renewal Therapy SPF 35, which can visibly improve the appearance of dark circles, puffiness, and fine lines and wrinkles.
Picking the Color of Your Concealer
It’s wise to invest in two shades of concealer. One should be very similar to your skin tone and can be used to cover dark spots, pimples, and other facial blemishes. The other should be lighter than your skin tone and can be used to highlight certain areas of the face or add clarity to your makeup look.
Note: Some women prefer to apply concealer before liquid foundation. The order of these two steps is truly a matter of preference—and trial and error. Try out both and discover which method works best for creating a smooth, radiant finish on your skin.
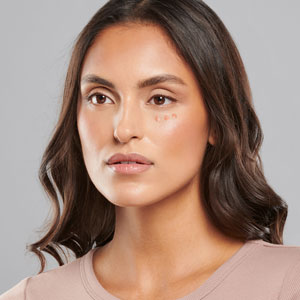
Where to Apply Concealer
To reduce the appearance of dark under-eye circles and create a glowing, bright look, apply light concealer beneath the eyes with a damp sponge or makeup brush, and consider using a dark circle cream.
If you’re using a concealer to minimize the appearance of blemishes, apply directly to the area where you want coverage.
To highlight your face using a liquid or cream concealer, place small dots in the following areas:
-
Horizontally over the center of your forehead
-
Down the center of your nose
-
Under your eyes
-
In a curving arch at the top of your chin, just under your bottom lip
Gently blend it into the surrounding skin, and always be sure to cover with a foundation or setting powder.
Step 5: Foundation Powder
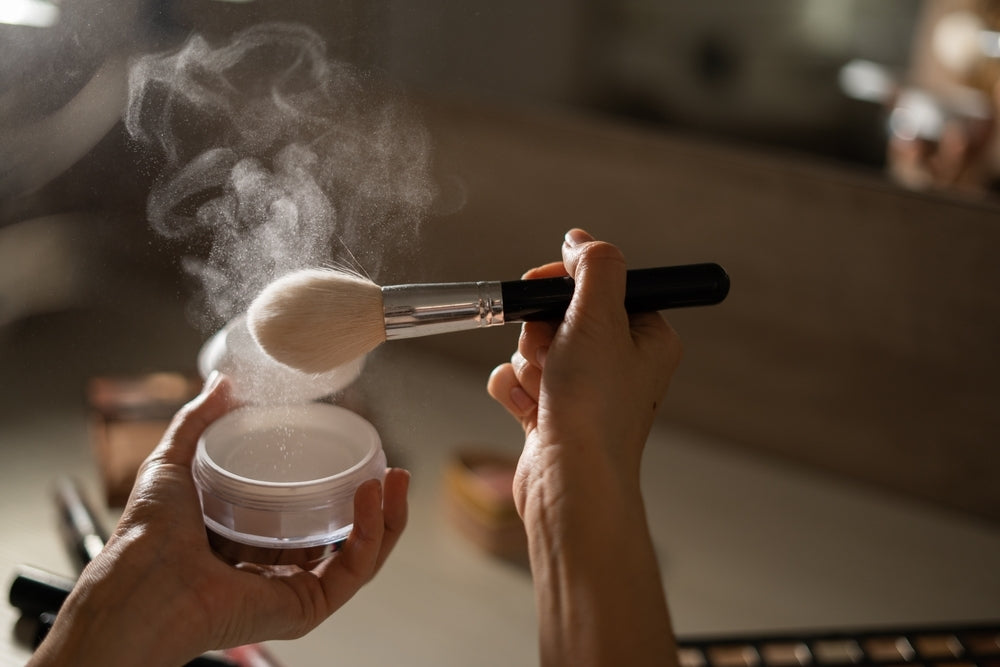
Applying foundation powder can be a tricky process; too little and you may as well have skipped the step altogether, too much and your makeup can start to look thick. In your quest for a flawless complexion, you’ve likely heard plenty of tricks of the trade regarding powder foundation. Keep these tips in mind to get that perfect complexion.
Using a large, fluffy powder brush, begin by dusting a light coat of powder all over your face. Press the bristles into the powder, then sweep across the skin in long, arching strokes.
If there are certain areas of your skin that need more coverage (the red and oily parts of your face are generally found in the center), you may want to apply a bit more powder. For this step, place your brush into the powder, then firmly press it into the skin; this step helps the powder make its way into pores and lines for a smoother texture.
Powder Foundation Recommendations
The Sunforgettable® Total Protection® Brush-On Shield SPF 50 is great for on-the-go protection. This all-mineral powder combines SPF 50 with full-spectrum defense, making it a standout in skincare makeup hybrids. Plus, its gentle, hydrating formula contains hyaluronic acid and antioxidants to keep your skin nourished, all in a portable brush design.
It’s non-comedogenic, hypoallergenic, and easy to layer over makeup or wear solo. With 80-minute water and sweat resistance, this brush-on shield makes SPF reapplication a breeze, even on your busiest days.
Makeup so light, you'll forget you're wearing any!
Colorescience's mineral powder formula is lightweight, easy to apply, and keeps your skin looking bright and vibrant.
SHOP NOWStep 6: Bronzer
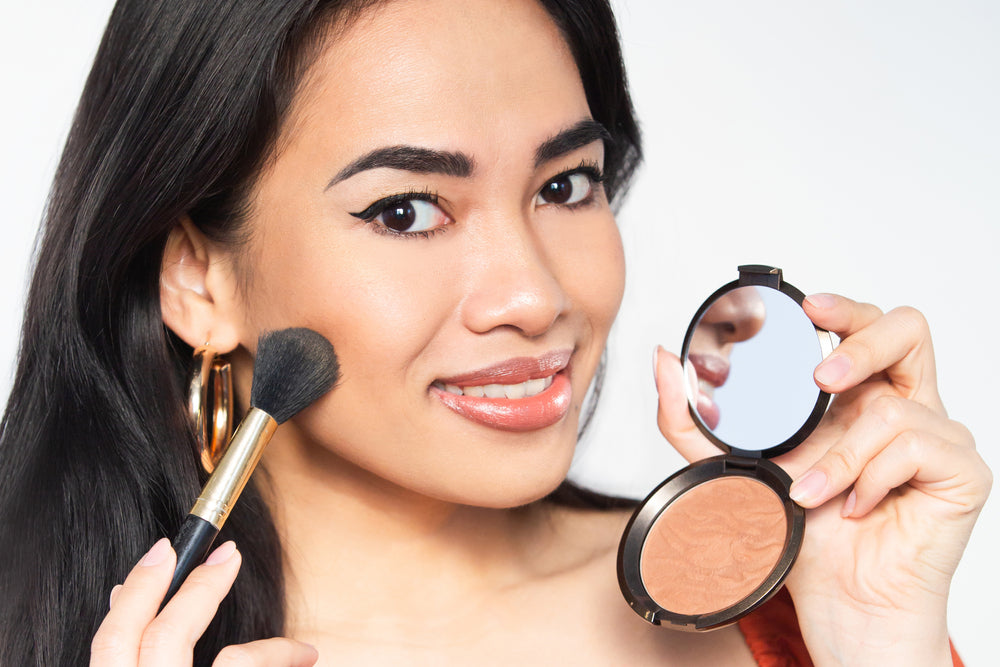
Bronzer can give your skin that sun-kissed glow all year long. Use a dedicated bronzer brush to sweep a golden tan across your face; bronzer brushes are crafted with more bristles, and placed much more tightly together, ensuring you get the most out of your colorful bronzer with each and every swipe.
How to Choose the Right Shade of Bronzer
One of the most common bronzer blunders comes in choosing the wrong shade. If you’re not used to working with bronzer, use one that’s two shades darker than your skin at most.
Where to Apply Bronzer
Once you’ve got the right shade, apply your bronzer in the shape of a number “3” on both sides of the face. Start at your forehead, pull the bronzer along your cheeks, then sweep it across the jawline, reaching all the way down to your chin.
Pro Tip: Don’t forget to blend it into your neck. Repeat on the opposite side.
Bronzer Recommendations
Add a sun-kissed glow with the Sunforgettable® Total Protection® Color Balm SPF 50 in shade Bronze. This shimmering, golden bronzer is designed to highlight your face with a natural-looking radiance.
The balm’s hydrating, conditioning formula leaves your skin looking fresh and glowing, while its water and swear resistance properties ensure long-lasting wear. Safe for sensitive skin, simply swipe, blend, and go for a luminous, beachy finish.
Step 7: Blush

Flushed cheeks have been a mainstay of makeup glamour for centuries. If you want to add a bit more color and vibrancy to your complexion, blush may be the key. Use a dense brush with plenty of bristles to apply your blush—this will make sure you get the most out of every blush sweep.
Where to Apply Blush
There’s not a one-size-fits-all answer for blush application. Use the color of your blush to help you decide where to apply it.
-
Pink blush: When using pink blush, apply it only to the apples of your cheeks. Pink blush is designed to mimic the natural flush your body creates, during which blood pools into your cheeks. To find the apples of your cheeks, put on your best smile. The “apple” refers to the front part of the cheek that becomes more pronounced when you sport a grin.
-
Plum blush: Those with medium to dark skin tones can use plum blushes in the same way those with fair complexions use light pink blushes.
-
Peach blush: Instead of using pink blush on just the apples of the cheeks, utilize these shades to help sculpt your face and add just a tiny hint of color. Twist one side of your face (as if you were pursing your lips and directing them to the opposite side of the face). Then, sweep the peach blush along your cheekbones, starting near your ears and ending at the apples of your cheeks.
Blush Recommendations
Choose the Sunforgettable® Total Protection® Color Balm SPF 50 once again for a fresh, everyday glow. With five different shades of blush to choose from, your perfect shade is covered from a subtle flush of pink to a deep berry red. .
It blends seamlessly for a natural finish and is perfect for quick touch-ups and all-day wear. Available in five shades, it can even double as a hydrating lip color.
Step 8: Highlighter
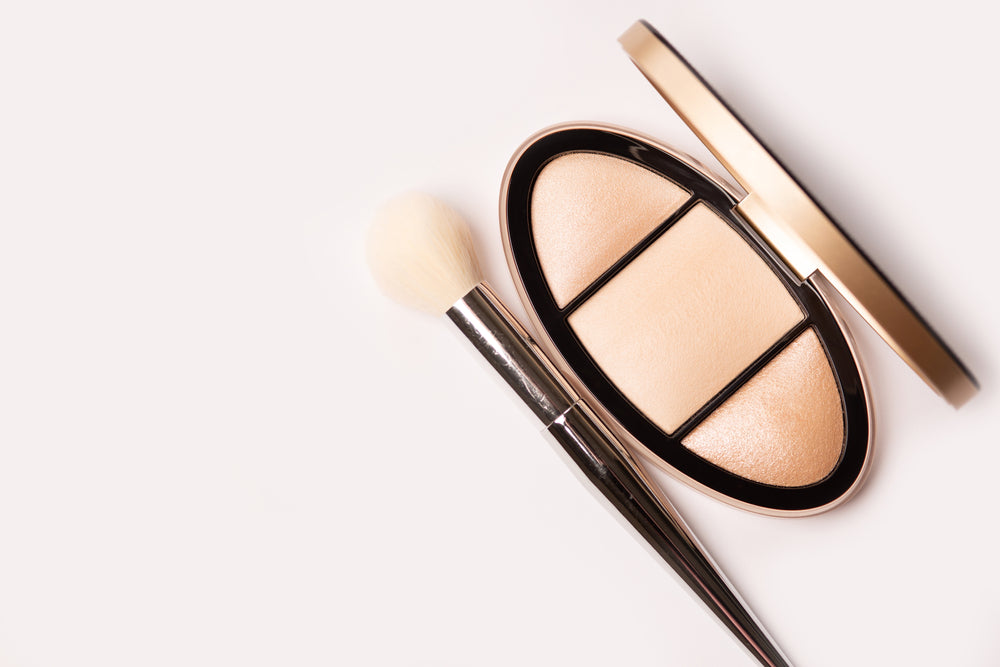
The right highlighter adds a bit of glam and glow to every makeup look. Whether you’re opting for a more natural look or want something bold and beautiful, highlighter can complement your makeup application.
Highlighters come in a variety of forms, including liquids, creams, and powders. You can choose to use one, or find your favorite combination of two or three. Whatever you choose, the application process remains the same.
Where to Apply Highlighter
After you’ve created a flawless canvas with your new foundation routine, map out the areas on your face that you wish to highlight.
Using a liquid highlighter first, apply in the following areas:
-
Down the bridge of your nose
-
Across the tops of your cheekbones
-
In the inner corners of your eyelids
-
On your brow bone
-
The indent above your upper lip (also called the Cupid’s Bow)
-
The center of your forehead
-
The center of your chin
Once you’re happy with your liquid highlighter application, blend it in using your fingertips or a sponge. To maximize the effect of your highlighting, layer in cream or powder highlighter over the areas you wish to accentuate.
Highlighter Recommendation
Get that radiant, lit-from-within glow with Sunforgettable® Total Protection® Face Shield Glow SPF 50. This all-mineral formula adds a subtle golden-peach luminosity while protecting your skin from pollution and UVA/UVB rays.
Ideal for any skin type, it’s lightweight, non-greasy, and hypoallergenic—an effortless highlighter in your order of makeup application. You’ll be sure to shine bright while staying protected and hydrated all day long.
Enhance your look and put your best face forward!
Colorescience has everything you need to achieve healthy, beautiful skin.
SHOP NOWStep 9: Eyeshadow

Eyeshadow can add interest to your makeup look, whether you opt for neutral shades or go bold with colorful hues. Whichever look you use, grab two complementary eyeshadows: one lighter shade, and one darker shade.
Dip your eyeshadow brush into the light shade, then tap the brush to get rid of any excess product. Apply the lighter shadow across the entire lid, starting at the lash line and ending just above the crease of your eyelid.
Now dip your brush into the darker color, tapping off the excess once again. Apply the color at the outer corner of your eye, just above your lash line. Sweep the darker color across your eyelid crease, just under the brow bone.
Stop application around the center of your eyelid, as you don’t want to darken the inner corners. Take a clean shadow brush and blend the two shades together. If you’d like a more intense look, reapply the darker shadow once more.
Eyeshadow Recommendation
Give your eyes a fresh look and lasting protection with the Mineral Corrector Palette SPF 20. This versatile skincare-makeup solution includes five skin-neutralizing shades that blend effortlessly for a natural look.
You can even try out the Bronze or Blush shades for a radiant look. Plus, it’s great for sensitive eyes and contact lens wearers.
Step 10: Eyeliner

Applying eyeliner can be difficult for even practiced makeup wearers, but these essential tips can help you get the hang of it faster.
Types of Eyeliner
- Liquid eyeliner: If you’re looking for precision, liquid eyeliner is your new best friend. You can find liquid liner in bottle form, which is applied with a fine dipping brush. You can also find liquid liner in a marker-type pen.
How to apply: With liquid eyeliner, start thin at the inner corner of your eye, then make the application thicker towards the outer corner. You can start lining at the middle of your eye, or in the inner corner, and keep the liner tip or brush as close to the lash line as possible. Use small strokes of your liner to create small dashes along the lash line, then connect them to fill in the gaps. If your hand slips, don’t worry! Apply a bit of eye makeup remover to a Q-tip and clean up the area.
- Gel eyeliner: This type of eyeliner typically comes in a small pot, with a thin brush for application. Gel eyeliner is fantastic for creating a cat-eye look.
How to apply: Dip a flat, angular brush into the gel eyeliner pot. Swirl the brush to ensure both sides have product on them, and start application in the middle of the lash line, working outwards. Then, draw a line from the inner corner of your eye towards the middle, connecting the two lines.
- Pencil eyeliner: This is typically the best eyeliner option for beginners. A sharp pencil eyeliner is easy to use on your waterline, and is great for creating a smokey eye.
How to apply: Sharpen your liner pencil each time you use it. After pulling your eyelid taut, draw small light dots starting at the outer corner of your upper eyelid. Work your way into the inner corner of your eye to create a thin dotted line, as close to the lash line as possible. Connect the dots with your pencil, or use a small shadow brush to blend them in.
Step 11: Mascara
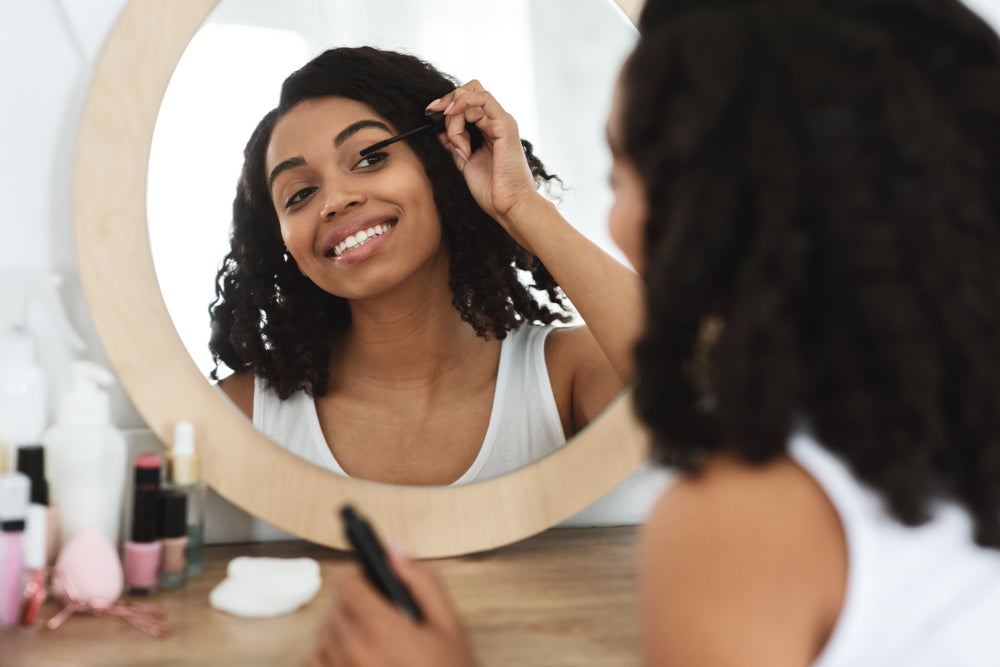
If you’re going to use only one makeup product, mascara should be at the top of your list. A few swipes of mascara can make your eyes look brighter in a single step.
You can find mascara in a variety of colors, but black and brown tend to be the most popular. Start by curling your eyelashes with an eyelash curler.
How to curl your eyelashes:
-
Place the curler at the base of your upper lashes, being careful not to grab any of the sensitive skin around your eyelid
-
Slowly close the curler
-
Hold it in place for a few seconds
-
Release gently
After your eyelashes are curled, grab your tube of mascara. Gently swirl the wand around to ensure all the bristles are coated in mascara.
Pro Tip: Don’t pump the wand into the tube, as this allows air to get in and may cause your mascara to clump.
Wriggle the mascara brush lightly across the roots of your lashes. This will create more volume, which you can then pull through to the ends of your lashes. If your lashes clump together, grab a clean wand and brush through them. Apply a second coat for more volume.
Mascara Recommendation
Transform your lashes with Total Lash™ Mascara, designed to lengthen, strengthen, and enhance your natural beauty. Infused with a powerful peptide lash serum, this all-in-one, innovative mascara formula adds dramatic length and volume while also nourishing your lashes to prevent breakage.
Its tubing technology wraps each lash in a rich black coating that lasts all day yet effortlessly slides off when you remove makeup with your favorite cleanser or wipe. No more harsh scrubbing!
The conical brush tip ensures every lash is coated from root to tip, including those tricky inner and outer corners. With continued use, botanical extracts support healthy growth while hydrating panthenol and jojoba oil to condition your lashes for a soft, flexible feel.
Step 12: Lip Gloss
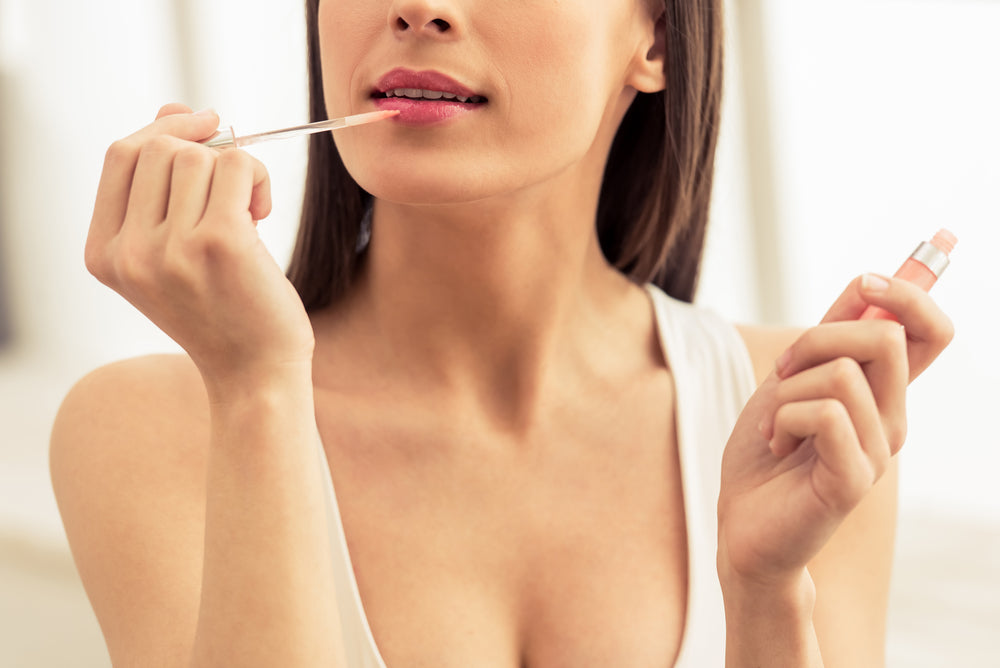
Before applying gloss, prep your lips. If your lips are chapped and cracked, be sure to use a gentle lip scrub to remove any dead skin and apply a protective lip gloss. Next, use a lip conditioner or moisturizer to soften the lips further. After your lip balm has absorbed, blot any excess.
Begin applying your lip gloss from the center of your lips, and drag the applicator along the length of your pout. Try to avoid pulling any gloss above your natural lip line, and smack your lips together lightly to ensure your lip gloss reaches all the nooks and crannies of your lips.
When applying makeup around the mouth area, proper technique can help minimize the appearance of aging, though learning how to get rid of lip wrinkles requires dedicated skincare routine.
Lip Gloss Recommendation
Peptide Lip Shine SPF 30 comes in five versatile shades that achieve a polished, plump look for every occasion.
Now with double the peptides, this gloss boosts collagen for a fuller appearance and lasting hydration. Lightweight and conditioning, this lip gloss is the perfect blend of treatment and sheer color, leaving lips soft, smooth, and beautifully protected.
Step 13: Setting Spray & Setting Powder
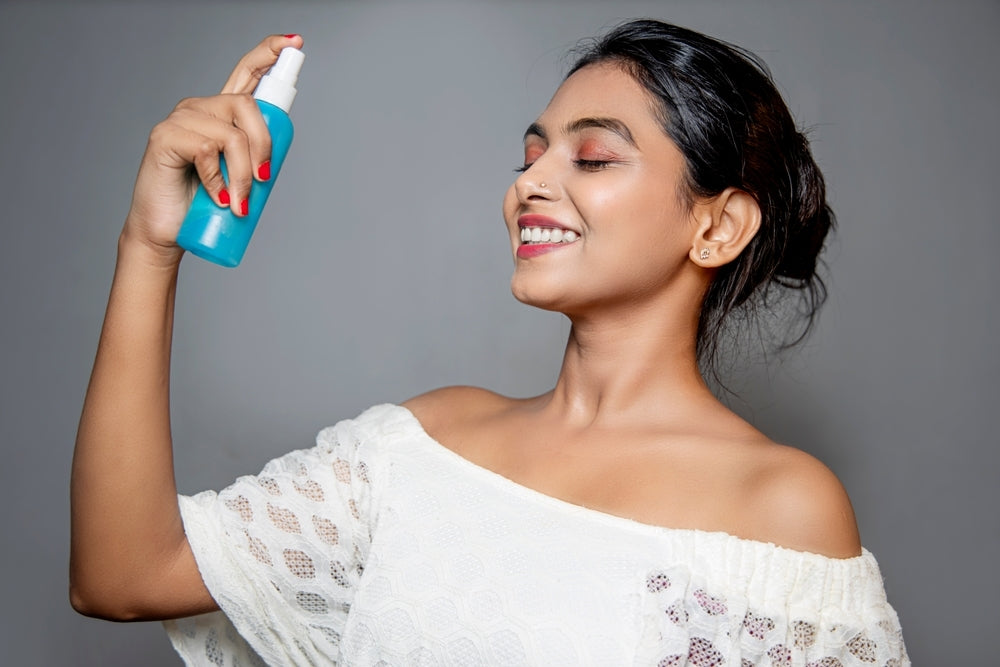
Setting spray or setting powder is the final touch for your makeup routine order. If you want makeup that stays on all day long without greasing, creasing, or shine, it’s important to invest in a quality setting solution.
Setting sprays are designed for all skin types and can be used to set a variety of looks, whether you’re rocking light coverage or sporting a full face of beautiful makeup. Setting spray keeps your makeup in place, helping you reduce reapplication needs and keeping your makeup looking flawless for hours at a time.
Setting spray is to your face as hairspray is to your hair, and it’s applied in a very similar fashion. Hold the bottle at least 8 inches from your face, then spritz lightly a few times to ensure all bits of your face are covered. If you want to ensure your makeup is covered from forehead to chin, first spritz in an X shape across your face, then follow it up by spraying a T shape.
There’s no need to rub the spray in once applied, as it will dry naturally within seconds.
Setting Spray Recommendation
Experience a refresh that goes beyond simple makeup setting with the Hydrating Mist Setting Spray. This botanically-infused mist, featuring calming chamomile and hydrating D20 Heavy Water, soothes and locks in makeup for all-day vibrancy and smudge-free wear. It’s great for use before, during, or after makeup application, as it keeps skin looking dewy and feeling fresh.
Final Look
Your makeup is complete! As you can see, you can seamlessly incorporate this guide on how to apply makeup step by step into your everyday life. With these application tips, it’s easy to create a variety of looks, whether you’re headed to the office or going out for a night on the town.
As you master application order, a breakdown of different makeup brushes helps you pick the right tool for each step.
Optional Steps to Take Your Makeup Look to the Next Level
Alright, now that we have covered the basics and given you a base to go off of for a step-by-step makeup application process, we want to give you a few more ideas that can be seen as optional steps to take your makeup look to the next level.
So, what exactly do we have in mind? Keep reading to find out.
FAUX FRECKLES
Nowadays, makeup gurus and influencers are applying faux freckles to add character and charm to their cheekbones. If you decide to take advantage of this optional step, it should happen before your setting spray and maybe even before your foundation powder makeup step.
If you want them to be subtle, you can apply them early on in your process, and for a more eye-catching dominant look, save it for second-to-last.
ADD GLITTER
Let’s face it, everything's better with glitter, so a makeup look is no exception. Adding glitter to your eyeshadow step would be most common, but you can also add additional sparkle to your cheeks if you’d like. In that case, glitter should be applied last.
DOCUMENT YOUR LOOK
This optional step doesn’t exactly add to your look, but it helps you to remember the makeup looks you have created; it gives you the option to share it with others and provides you with reference to learn from for the future. Don’t be afraid to snap a picture and be proud of the makeup steps you’ve mastered.
CLEAN YOUR BRUSHES
You may think that this optional step won’t take your look to the next level, but when you have clean brushes, you are making it so you are giving your makeup the best chance at applying evenly and with the desired intensity.
Plus, you’ll be able to rest easy knowing that you have taken the proper steps to ensure that your materials and makeup are as close to bacteria-free as possible. Trust us, your skin will thank you later.
REPLACE WHEN YOU’RE RUNNING LOW
When you start to run low on your makeup staples, you want to be sure you are stocking back up and buying what you are running out of before you actually run out of it. If you wait too long, you may find yourself in a situation where you are unable to create the look you want.
How to Streamline Your Makeup Process Further

We know that sometimes you don’t have enough time in your day to have a full makeup application. But we can help you come up with a streamlined makeup process that will make it faster and more efficient. Not only is a streamlined process good to have in your back pocket for the day you are running late, but it also provides you with the option for a more natural makeup look.
When streamlining your face makeup steps, you want to stick to just the essentials. This includes:
-
Moisturizer: For a hydrated, healthy complexion, Barrier Pro™ Essential Moisturizer is your go-to daily formula that calms, nourishes, and locks in moisture for all-day comfort.
-
Primer: Prep your face for lasting makeup while brightening your complexion with Brightening Primer SPF 20.
-
Foundation: Achieve a flawless, natural finish with Natural Finish Mineral Foundation SPF 20, a weightless mineral foundation that delivers smooth, buildable coverage and protection.
-
Bronzer: Try Sunforgettable® Total Protection® Face Shield Bronze SPF 50, which does double duty by providing a beautiful bronze finish while protecting your skin from UV rays and other environmental aggressors.
-
Mascara: For longer, fuller lashes with nourishing ingredients, Total Lash™ Mascara gives you high-impact volume while promoting lash strength and resilience.
-
Lip gloss: Boost hydration and plump your lips with a hint of color using Peptide Lip Shine SPF 30 Savanna, an ultra-conditioning gloss perfect for everyday wear and all-day protection.
Just these few steps hit on all the major facial focal points (skin, eyes, lips), and are a good outline for how to do makeup step by step at home.

Technique matters, but understanding what is the best makeup for acne-prone skin ensures your step-by-step routine won’t trigger new breakouts.
How Do Beginners Buy Makeup?
Sometimes, buying makeup can be stressful and overwhelming, especially if you’re still learning how to apply makeup for beginners and which products you need to create your ideal makeup looks. The good news is that cosmetics are easier to find than ever before.
That said, keep in mind that not all makeup is created equal.
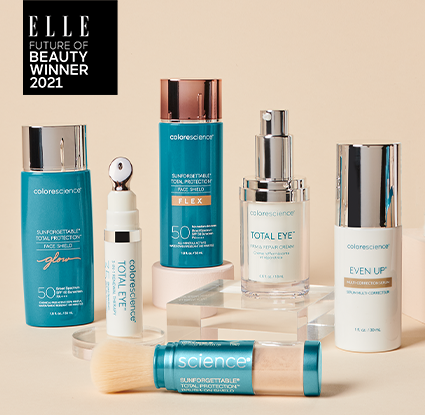
Colorescience is dedicated to creating gentle, high-quality mineral makeup that you can feel confident using. Plus, they can all be conveniently found online, so you can shop from the comfort of your home.
Proper makeup application can minimize the appearance of fine lines, though learning how to reduce crow's feet long-term requires consistent skincare with retinoids and antioxidants.
Your Makeup Routine Just Got So Much Better
After reading this guide, you should have all the essential tips for how to apply makeup step by step, so you can move efficiently.
We hope that moving forward you can use this guide to build confidence in your makeup application and take your look to the next level. You can always reference our tips to help you along the way.
Frequently Asked Questions
1. How to Set Makeup?
Setting spray or powder is your final step to lock in your look. Hold setting spray like 8 inches from your face and spray in an X then T pattern for even coverage. Alternatively, use a fluffy brush to dust Sunforgettable Total Protection Brush-On Shield SPF 50 across your face, pressing into areas needing extra coverage for lasting, flawless wear.
2. What Do You Need for a Full Face of Makeup?
A complete makeup routine includes moisturizer, primer, liquid foundation, concealer, powder, bronzer, blush, highlighter, eyeshadow, eyeliner, mascara, lip gloss, and setting spray. For streamlined application, consider multi-use products like Sunforgettable Total Protection Face Shield Flex SPF 50 for foundation coverage or Total Eye 3-in-1 Renewal Therapy SPF 35 as a concealer alternative for efficient, beautiful results.
3. What Comes First Concealer or Foundation?
Foundation typically comes before concealer, but the order is truly a matter of preference. Apply liquid foundation first to create an even base, then use concealer to target specific areas like under-eye circles or blemishes. Try both methods to discover which works best for your skin and desired coverage level—there's no single correct approach.
4. Where to Start With Makeup?
Always start with moisturizer to prep your skin, then apply primer to create a smooth canvas. Barrier Pro Essential Moisturizer hydrates and strengthens your skin barrier, while primers like Brightening Primer SPF 20 fill fine lines and help makeup last longer. These crucial first steps ensure your makeup goes on smoothly and stays flawless throughout the day.
5. What to Apply on Face Before Makeup?
Begin with moisturizer suited to your skin type—serums for lightweight hydration or creams for drier complexions. After moisturizer absorbs, apply primer to smooth texture and extend makeup wear. Colorescience offers primers targeting specific concerns: Calming Primer SPF 20 for sensitive skin, Mattifying Primer SPF 20 for oil control, or Brightening Primer SPF 20 for radiance—all with built-in SPF protection
SHOP NOW
Featured Products

Available in 4 shades
Total Eye® 3-in-1 Renewal Therapy SPF 35
(login for member perk!
+)
login for member perk!
Price:
$79.00
Price:
$79.00
(up to value)
$79.00


Available in 6 shades
Sunforgettable® Total Protection® Face Shield Flex SPF 50
(login for member perk!
+)
login for member perk!
Price:
$58.00
Price:
$58.00
(up to value)
$58.00


Color: